Wednesday, February 24, 2016

Swiss Chard Bourek


This is the North-African version of spanakopita with swiss chard, in which I substituted Emmental cheese with feta cheese. I find it is creamier and goes best with the earthy flavour of the swiss chard.
I already posted a bourek (meat filled) recipe with filo pastry and meat filling.

For 20 boureks
Ingredients
1 bunch swiss chard (stems removed) washed, chopped and blanched
4 tablespoons olive oil
4 tablespoons butter
1 small onion chopped
3-4 garlic cloves crushed (or less to taste)
3 eggs
Salt, pepper
Pinch nutmeg
1 tablespoon chopped fresh parsley (optional)
1.5 cup feta, crumbled
10 (17- by 12-inch) phyllo pastry sheets, thawed if frozen.
Lemon wedges for serving


Directions

The filling
  1. Sauté the onion with 2 Tbs olive oil in a saucepan over medium heat until translucent, around 10 minutes.
  2. Add the crushed garlic , salt and spices and saute for another minute. Be careful not to let the garlic burn.
  3. Add the 2 Tbs olive oil. Squeeze the swiss chard from excess of water and chop. Add to the pan. Season with the nutmeg, salt and pepper and continue cooking around 10 minutes until all the liquid is absorbed, stirring from time to time.
  4. Combine the eggs,  parsley and cheese and add to the pan.  Mix and cook until just set.
  5. Remove from heat and let cool. This step is very important.
Assembling
  1. Preheat oven to 375°F.
  2. Melt the butter in a small bowl in the microwave.
  3. Before you start : the Phyllo sheets need to be kept covered at all times with a damp towel. Have it ready for use. 
  4. Take 10 phyllo pastry sheets from the pack and arrange in front of you with a long side nearest you. Cut the sheets in two, crosswise. We we will use ½ phyllo sheet per bourek/triangle. Cover with a damp kitchen towel. 
  5. Take one piece and brush it lightly with the melted butter. Put a tablespoon of filling in the center, about 1-inch from the edge of the sheet near you; wrap the filling by folding the two phyllo edges over. You obtain a rectangle. Brush with butter. Fold one corner diagonally over  to form a triangle; continue folding to the left then to the right, like a flag, keeping the triangle shape. Moisten the edge to seal it.
  6. Brush the top with butter and set on a baking sheet, seam side down. Repeat step 5 with the remaining filling.
  7. Bake triangles in middle of oven until golden brown, 20 to 25 minutes.
  8. Serve hot with lemon wedges.
 

Note:You can make the filling ahead of time and keep it in the fridge.

Monday, February 8, 2016

Vegetarian Stuffed Red Peppers

These peppers are stuffed with rice, grated potatoes and cheese, and topped with a seasoned tomato sauce.


This is my mother's recipe, which is my husband's favorite since he loves potatoes and doesn't like meat too much. Usually I make it in the oven, mostly in summer time, but I wanted to try my new slowcooker (this is my third recipe using it). I prepared them in the morning and let them cook for 6.5 hours. It was torture all day: the aroma of the potatoes and cheese and tomato filled the whole house. It was very difficult to wait until they were done.

I had only 4 peppers in my fridge so I added 2 potatoes. The ingredients are simple: you can use both rice and potatoes or just one or the other.

I like to char the peppers to give them that smoky flavour, but you can skip this step, if you wish.


Ingredients
4 large red peppers (tops and seeds removed)
2 tablespoons + 2 teaspoons butter
Olive oil to drizzle

Stuffing:
2 medium grated potatoes
1 ½ cup cooked rice
1 egg
2 garlic cloves
Salt & pepper
2 cups tomato sauce
1 tablespoon chopped parsley if available
1 cup grated cheese (emmenthal or Jarlsberg)


Directions
  1. Char the peppers on the BBQ or in the oven broiler just enough to give them a smoky flavour, turning them once or twice during roasting. The whole process should take no more than 10 minutes. The longer they roast the softer they get: you do not want that to happen. The peppers should stay firm. Set aside
  2. In a big bowl, mix 1 tbsp of butter with the rice still warm. Add the grated potatoes, crushed garlic cloves, egg, parsley and cheese. Add salt and pepper to taste. Blend well.
  3. Generously butter the bottom and side of the slow cooker.
  4. Divide the filling among the peppers
  5. Place the peppers in the slow cooker. Add a round 1/2 tsp butter on top of each pepper.
  6. Pour tomato sauce around the peppers. Drizzle a little bit of olive oil.
  7. Cover and cook on low for 6.5 hours.

  8. See how beautiful it is when it's cooking!


    Bon Appetit!

Friday, January 23, 2015

Curry Chicken with Coconut Rice


My daughter made this beautiful dish for her supper. She lives alone and I am very happy that she actually cooks healthy food. So she sent me the picture and said it's quick, easy and very tasty!

Here is the recipe, try it and let me know what you think!

Ingredients
For the rice:
1 cup brown rice
2 1/2 cups of water
1/2 can of 60% coconut milk (400 ml)
Salt & pepper

For the chicken:
1 boneless chicken breast cut into 1 inch pieces
1 onion thinly sliced
1/2 tsp garlic powder
3 tsp turmeric
1 tsp garam marsala
2 tbsp oil
2 lime leaves
1/2 can coconut milk (optional)

Directions

  1. Wash the rice well and put in a saucepan with the water. Heat to a boil, then reduce to a simmer and cook 15-20 minutes until almost all the water is absorbed. 
  2. Add the coconut milk, cover and turn off the stove.

  3. Heat 1tbsp of oil in a pan and add 1 tsp of turmeric and the garlic powder to it. Add the chicken and cook on medium high heat.
  4. When the chicken is almost fully cooked, take it out into a bowl.
  5. Return the pan to the stove and heat the second tbsp of oil. Add the onions, 2 tsp turmeric, the garam masala and the lime leaves. Sauté until the onions are soft. Put the chicken back in the pan.
  6. When the chicken is cooked you can take it off the heat and add coconut milk (I just added the rest of the can from the rice!)

Bon Appetit!


Wednesday, December 31, 2014

Bûche de Noël (Christmas Chestnut Log)


My daughter made this buche for Christmas. The cake recipe is based on a recipe from America's Test Kitchen and the chestnut cream is a family classic. I helped her with advice on rolling, filling and decorating it.

Ingredients

Cake
5 eggs
¾ cup granulated sugar
¾ cup all purpose flour
1 teaspoon baking powder
Pinch of salt
1 teaspoon vanilla
12 by 16 inch baking sheet
Oil for the baking sheet
1 sheet of parchment paper
1 clean towel slightly bigger than the baking sheet
Confectioners' sugar for dusting

Chestnut Cream Filling
1 can chestnut puree
¼ cup granulated sugar
2/3 cup heavy cream
1 teaspoon vanilla

Chocolate Topping
7 ounces semisweet chocolate in small pieces
1 cup heavy cream
2 tablespoons butter
1 tablespoon dark rum (optional)

Directions
  1. Preheat oven to 375 degrees F. Brush the baking sheet with oil and cover with the parchment paper. In a large bowl beat the eggs, sugar and vanilla until pale yellow, 8 to 10 minutes. I used the flat beater on my mixer.
  2. Sift the flour in a big bowl, add the baking powder, salt and mix. Gradually add the dry ingredients to the beaten egg mixture folding delicately, until well combined.
  3. Spread the batter evenly in the baking sheet. Tap the baking sheet on the counter to remove any bubble. Bake until the cake springs back lightly when pressed, around 15 minutes.
  4. Dust the towel with confectioners' sugar. Use a small paring knife to loosen the cake from the sides of the pan and invert the warm cake onto the towel. Gently remove the paper. Cut any stiff edges if necessary. Starting at a short end, carefully roll the cake and towel into a log. Cool at least 30 minutes.
  5. Filling : in a saucepan, heat the chestnut puree, sugar, vanilla and cream on medium-low heat. Beat until smooth.
  6. Gently unroll the cake, and spread the chestnut cream leaving 1 inch from the edge. Re- roll up the cake. Place the cake on a serving plate to decorate.
  7. Don’t freak out if the cake cracks here and there, the topping will do a good job of sealing and hiding it.
    Tip: Put parchment paper around the cake. This will keep the plate clean while you're frosting. You can see how we did it in the image below.


  8. Topping : heat the chocolate and butter in a metal bowl over a saucepan filled of simmering water (to make a double boiler). Keep the sauce pan over low heat to melt the chocolate, stirring from time to time. Remove from heat, add the cream and rum. Stir until smooth. Spread the chocolate topping over the cake. Let it set for 2 minutes.
  9. Use a fork to make ridges in the frosting to imitate a tree bark.


  10. Decorate with whipped cream and fruits.


Tips:
  • Make sure the cake doesn't overbake and become too dry, or it will be hard to roll.
  • If you let the chocolate topping cool down too much it will set up, so frost your cake while it is still liquid or reheat before using.

Saturday, December 27, 2014

Onion and Cheese Quiche


This quiche is always a big hit at home. This year I doubled the recipe to make two of them: one for the Christmas potluck lunch at the office and one for the family.

You will notice, I use margarine instead of just butter. I find that it makes the crust more flaky.I like to pre-bake the crust to avoid sogginess. Depending on my mood and the time I have, I use one or the other method described in the Tips below. 

Timing wise: the onions take 45-50 minutes to caramelize (on medium-low ) so I suggest that you start with the dough and cook the onions while the dough is resting in the fridge.


Ingredients
Dough :
2 cups flour
½ cup butter (softened)
3 tablespoons margarine
1 teaspoon salt
3-4 tablespoons water

Filling:
4 eggs
4 big onions
1 cup heavy cream or coconut cream
2 cups grated cheese (Gruyere, Swiss cheese, Jarlsberg)
2 tablespoons olive oil
1 teaspoon sugar
Nutmeg to taste (1 or 2 pinch)
Salt,pepper

11 in (27 cm) pie pan.

Directions
Prepare the crust
  1. Combine the flour, salt, butter and margarine to obtain something like a coarse cornmeal. Sprinkle the water, one tablespoon at a time and mix just enough for the mixture to hold together and turn into a smooth dough. Add more water if needed.
  2. Form a ball, wrap in plastic and refrigerate for 20-30 minutes.

Cooking the onions
  1. Peel and slice the onions.
  2. Heat oil over medium-low heat in a large saucepan. Add the onions and cook slowly uncovered, stirring occasionally, until the onions are soft and translucent around 30-40 minutes.
  3. Add the sugar, stir and cook another 15 minutes until the onions are slightly caramelized. The sugar helps caramelize the onions.
Assembling and baking the quiche
  1. Pre-heat the oven to 400F (200 C), with the rack in the middle position.
  2. Sprinkle work surface with flour. Roll out and transfer to the pan pressing up the sides. See notes below.
  3. Bake the shell for 15 minutes.
  4. In a small bowl, beat together the eggs and cream. Stir in the grated cheese. Season with salt, pepper and nutmeg. Put aside half of this mixture for the top.
  5. Mix the other half with the onions and spread on the partially baked crust.
  6. Pour the remaining egg mixture over the onions to form a nice golden top.
  7. Bake until the quiche has puffed and is golden brown, 30 to 35 minutes.

Tips on pre-baking the crust:
(1) A quick method is to prick the bottom of the crust with a fork and bake for 15 minutes. The crust might be a little bit bumpy.
(2) If you want to be sure your crust is even, line it with foil and pour around 2 cups of dried beans to weight it down. Bake 10 minutes. Remove the foil and beans, and prick the crust with a fork to let any air bubble escape. Bake another 3-5 minutes.

Sunday, December 21, 2014

Pandoro


Every year I have a list of recipes to make during the holiday season. Last year when Simonetta Held posted the Pandoro Sfogliaro on Google+, I promised I would try it. So I did and it came out almost perfect. I made it again this year and it came up more beautiful, very light and delicate.

I started prepping the day before and left it to rise all night. In the morning the size had tripled! It was more than ready to go into the oven.

The Pandoro is baked in a star-shaped but you can use any mold as long as it is deep enough.

The final step is very similar to making puff pastry. The Pandoro takes more time and more patience to make than the Panettone, but it was definitely worth it.


In the end it doesn't have the traditional look, but the taste is almost perfect.

You will find a lot of tips at Simonetta's blog.


Ingredients
3 cups all-purpose flour plus more for dusting
1 + 1/2 teaspoons of instant dry yeast
1/2 cup + 2 tablespoons sugar
1 tablespoon brown sugar
3 eggs + 1 yolk
1/2 cup + 2 tablespoons unsalted butter
1 teaspoon vanilla extract
Zeste of 1 lemon
1/2 teaspoon salt
1/3 cup + 2 teaspoons water

Tools
Mold: 7.5in diameter x 4in high
A rolling pin.
A stand up mixer or food processor

Directions

.Step 1: the starter - 11am
  1. Mix 1/3 cup of flour and 1 teaspoon of instant yeast.
  2. Add the brown sugar and 1/3 cup of water. Mix very well then place to rise until doubled (50-60 minutes).
Step 2: Dough #1 - 1pm

For this step you will need the following out of the ingredient list above:

1+ 1/3 cup all purpose flour
¼ teaspoon instant dry yeast
2 tablespoons granulated sugar
2 tablespoons butter softened
2 teaspoons of luke warm water
1 egg + 1 egg yolk

I use a KitchenAid stand mixer for all my breads and brioches, it helps a lot. If you don’t have a similar appliance, it will take a little bit more time and muscles!
  1. Mix the yeast with the flour and add to your starter.
  2. Beat the sugar, egg and egg yolk and water in a bowl. Gradually add to your starter and flour. Combine well.
  3. Add the butter one small piece at a time. Knead until everything is well blended and smooth.
  4. Cover and let it rise until it doubles in size.
Step 3: Dough #2 - 4pm

For this step you will need the following out of the ingredient list above
:

1 1/3 cup all purpose flour
½ cup sugar
2 eggs
1/2 teaspoon salt
zest of 1 lemon
2 teaspoon vanilla extract
½ cup butter softened

  1. Beat the sugar, egg, salt and zest in a bowl and add to the first dough.
  2. Add the flour.
  3. Knead until everything is well blended and smooth. If the dough is too sticky, add one or two tablespoons of flour (one at a time). I knead it 15 minutes. Put in a buttered bowl, cover and let it rise until it doubles in size.
  4. Mix the butter and the vanilla together. If the butter is not soft enough, put it few seconds in the microwave. Leave it at room temperature until it is used in the next step.
Step 4: Puff pastry steps - 7pm

For this step you will need the mix of butter and vanilla and a rolling pin.

  1. Roll out the dough into a rectangular shape around 1-1.5 inches thick.
  2. Distribute the cold butter over in small pieces.
  3. Fold the top third of the rectangle down over the dough.
  4. Seal the seams by pinching the dough in order to trap the butter inside.
  5. Chill 20-25 minutes in the fridge.
  6. Repeat steps 1-5 three times.
  7. Butter and dust your Pandoro mold with flour.
  8. Form a ball with the dough and transfer to the mold, smooth side part at the bottom.
  9. Cover and let rise until the size doubles or triples.
  10. Transfer to the mold and let it rise. Again I put it in the oven with the light on. It should reach the edge of the mold.
I left it over night with a temperature of 67-68 DegF (19 DegC), but if it’s in a warm corner, 2-3 hours may be enough.

Step 5: Baking- Next day 8am
  1. Pre-heat the oven at 375 DegF.
  2. Bake for 15 minutes, then lower to 350 DegF and cook until golden brown (about 30 minutes). Check doneness with a skewer.
  3. Let it cool before unmolding it. Transfer to a plate and dust the surface with sifted icing sugar to decorate.

Tips

Make sure the butter is not too soft and refrigerate the dough in step 4 as instructed. If it's not cold enough and the butter is too soft, you will have a hard time folding the dough.


The picture below is my first trial, it was very good but it needed another 10 minutes in the oven to hold itself correctly. I left it to rise overnight in the oven, no draft.
.

Note: I started it around 11:00 in the morning and finished around 8:00 pm, most of it being waiting time.

Saturday, December 13, 2014

Chocolate Bundt Cake with Raspberry Sauce


I looked at various bundt cake recipes and then I came up with my own based on what I had in my cupboard. The result was surprisingly good in my daughter's own words: the right amount of chocolate and super moist. She wanted the recipe to make one for the office xmas potluck. I simply served it with a homemade raspberry sauce. I had frozen juice made from my garden's berries, so I just heated it and stirred in 2 teaspoons cornstarch, et voila!


Ingredients
10 squares unsweetened chocolate (10 oz)
¾ cup butter (1.5 stick)
2 tablespoons mayonnaise
1 2/3 cups granulated sugar
4 eggs (yolk and white separated)
2 1/2 cups all-purpose flour
1 cup milk
1 tablespoon baking powder
1 tablespoon vanilla extract
1/4 cup rum


Directions
  1. Preheat oven to 375 degrees F (190 degrees C).
  2. Butter and flour a 10 inch Bundt pan.
  3. Sift together the flour and baking powder.
  4. Place the chocolate and butter in a metal bowl over a saucepan filled with a little of water (to make a double boiler). Heat the sauce pan over low heat to melt the chocolate, stirring from time to time. Let it cool.
  5. While beating, add the mayonnaise, sugar, vanilla, egg yolks and rum.
  6. Gradually add flour mixture alternating with the milk.
  7. In a separate bowl, beat the egg whites until stiff peaks then gently fold them into the batter mixture.
  8. Pour into the pan. Bake in the middle of the oven for about 10 minutes at 375 F then lower the heat to 350 F (165 degrees C) and bake for a total of 50-60 minutes or until a toothpick inserted into cake comes out clean.
  9. Let cool for 10-15 minutes in the pan, then turn out onto a wire rack and cool completely.


Serve with raspberry sauce or chocolate sauce. You can also just dust with sugar and serve.


Wednesday, November 26, 2014

Quince Jam and Marmalade


Quince are very rare to find in Montreal and when they are, usually they are expensive. It's basically more cost effective to buy already made jam. But, once a year I like to make homemade jam, marmalade or paste. I have already posted the recipe for quince paste last year.

In this recipe I am using 2/3 of the sugar called for in the original recipe. Two reasons for that: first I know it will not last (sugar acts as a preservative, so a high sugar jam will last longer) and second I am trying to cut the amount of sugar we eat for health reasons.


I used the same proportions for both jam and marmalade. Once the fruit was cooked, I blended half in Marmalade and left the other half in pieces.


Ingredients
6 small quinces (around 2.2 lb)
2 cups granulated sugar
4 cups water
1 lemon juice

Directions
  1. Combine the water and lemon juice in a large pot.
  2. Peel and cut the quince in small pieces and place directly in the pot.
  3. Add sugar and bring to a boil (the quince should be covered with water). Reduce the heat and simmer, stirring from time to time, until the fruit is soft, about 40 minutes.
  4. Blend the quince, if desired, and pour it still hot into sterilized jars.

Note: I left half of the quince in pieces and blended the other half.

Sunday, November 16, 2014

Green Tomato Jam


The Joy of gardening in Canada!
Even if the calendar says it is spring, you cannot seed or plant yet.
The growing season (the number of days between the last frost in spring and the first frost in fall- time for plants to grow from seed to maturity) in a cold climate won’t begin until end of May, when the risk of frost is completely gone.
In February-March there is a lot of excitement around garden planning and even starting seeds inside. And then the waiting begins.

Basically there are just 3.5 months of « safe gardening » June, July, September and the first 2 weeks of October. And then the inevitable occurs : you wake up one morning just to find your plant leaves half burnt from an early freeze.
How frustrating ! Your vegetable leaves are all withered. The beautiful tomatoes that you just starting enjoying, the butternut squashes, your pride hanging naked now that their huge leaves are withered. I will not list all of them.

So you have to pay attention to frost warning issued by the weather forecast and harvest everything that’s ready or almost. I used to let green tomatoes continue to ripen on the counter but most of them were damaged after few days before ripening.
And then I remembered that my mother used to make ripe tomato jam, which I hated! I thought I should try it with green tomatoes and maybe just maybe my family will like it.

Guess what? I like it more than they do! The longer it cooks the better it gets. Actually it tastes very much like fig jam. If you try it let me know if you agree.


Ingredients
2.2 lb green tomatoes washed and cut into small pieces
1.1 lb sugar


Directions
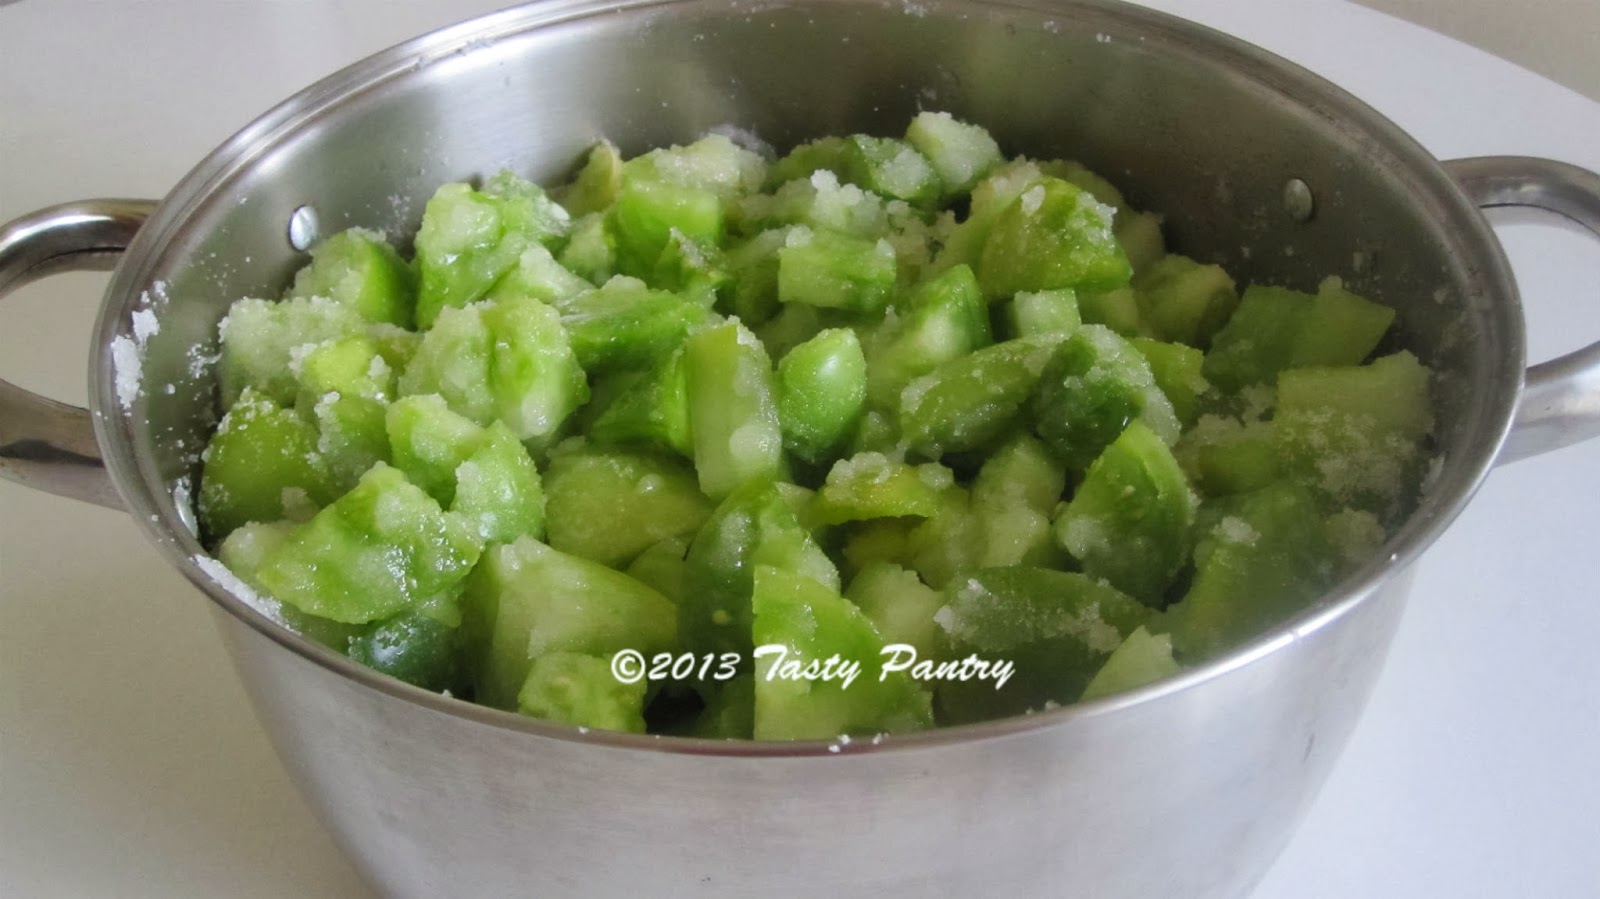
  1. In a large pot, mix the tomatoes and the sugar, cover and let stand few hours or overnight in the fridge. The tomatoes will release their juice.


  2. Bring to a boil on a medium-high heat. When the liquid reaches the boiling point lower the heat to medium-low. Cook around 45 minutes or until the jam takes a slightly amber color.
  3. Fill the jars while jam is still hot, so you will not need to sterilize.
  4. Wipe the rim clean and seal.


Monday, October 27, 2014

Apple and Prune Crumble


This is my favorite dessert: very quick and easy to make and it's always a hit with my family. Feel free to substitute the type of apples and the flavor to match what you have at hand.

Ingredients
6 prunes cut in 4
6 apples (such as Cortland, Golden delicious)
1/3 cup heavy cream
1 cup brown sugar + 2 Tbs
1 cup all-purpose flour
1 cup rolled oats
3/4 cup butter at room temperature
1 teaspoon freshly grated ginger
11-by-8 inch baking dish

Directions
  1. Preheat the oven to 350°F.
  2. Lightly coat the baking dish with butter.
  3. Mix the oats, flour and sugar in a bowl. Add the butter in pieces and blend in with your fingers until the mixture looks like coarse bread crumbs.
  4. Peel, core and slice the apples approximately 1/4inch thick. Place directly in the baking dish. Add the prunes, 2 tablespoons sugar , the ginger, the cream and toss to coat.
  5. Top evenly with the crumble mix.
  6. Bake until golden and bubbly 40- 45 minutes.